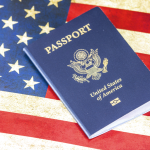
Creating a 2×2 inch photo for official documents like passports or visas can be a daunting task, especially if you’re pressed for time. Fortunately, with the right tools and a few simple steps, you can produce a professional-quality photo in just five minutes. This guide will walk you through the process of using Pixelcutout’s product, which allows you to change the background color of your images for free, ensuring your photo meets all necessary requirements.

Passport Photo Specifications
| Requirement | Details |
| Size | 2 x 2 inches (51 x 51 mm) |
| Resolution (DPI) | 600 DPI |
| Digital Photo Size | 600 x 600 pixels |
| Background Color | Plain white or off-white |
| Printable Photo | Yes, on glossy or matte photo paper |
| Digital Photo for Online Submission | Yes, in JPEG format |
| Head Size | Between 1 inch and 1 3/8 inches (25-35 mm) |
| Recency | Taken within the last 6 months |
Requirements for a 2×2 Photo
Before diving into the process, it’s essential to understand the requirements for a 2×2 inch photo:
- Color and Quality: The photo must be in color and printed on high-quality paper.
- Recency: It should be taken within the last six months.
- Background: A plain white or off-white background is required, free of patterns or objects.
- Facial Expression: Your face should be directed towards the camera with a neutral expression; no smiles or frowns.
- Visibility: Eyes must be open and clearly visible without shadows or hair obstructing them.
- Headgear: No hats or head coverings are allowed unless worn for religious purposes.
- Glasses: Glasses should not be worn, even if they are non-tinted.
- Alterations: The image should not be digitally altered to change your appearance.
How to Use Pixelcutout’s Product to Create a 2×2 Photo
Step 1: Prepare and Upload Your Photo
- Start by taking a clear photo of yourself against a plain background. Ensure good lighting and a neutral expression.
- Open Pixelcutout and upload the photo you just captured. This can typically be done by dragging the image into the application or using the upload button.
Step 2: Choose Your Photo Sizes
- Once your photo is uploaded, navigate to the sizing options within Pixelcutout.
- Select the 2×2 inch size option, ensuring that it meets the required dimensions for passport or ID photos. You may also need to adjust the cropping to center your face properly.
Step 3: Download Your Edited Photo
- After adjusting the size and making any necessary edits, save your work.
- Download the final 2×2 photo in a high-resolution format suitable for printing or online submission. Make sure to check that it meets all official requirements before finalizing.
Conclusion
Creating a professional-looking 2×2 inch photo doesn’t have to be time-consuming or expensive. By using Pixelcutout’s product, you can easily change the background color of your images and ensure compliance with all necessary requirements in just five minutes. This method not only saves you money but also gives you control over how you present yourself in official documents. With these steps, you’ll have a perfect ID photo ready for submission in no time!